Action Life Media

action life media

  • Facebook
  • Instagram
  • Twitter
  • Home
  • About
  • Business
  • Finance
  • Home & Garden
  • Photography
  • Technology
  • Travel
  • Blog
  • Contact

April 13, 2022 by: Miles

5 Reasons to Hire a Business Photographer

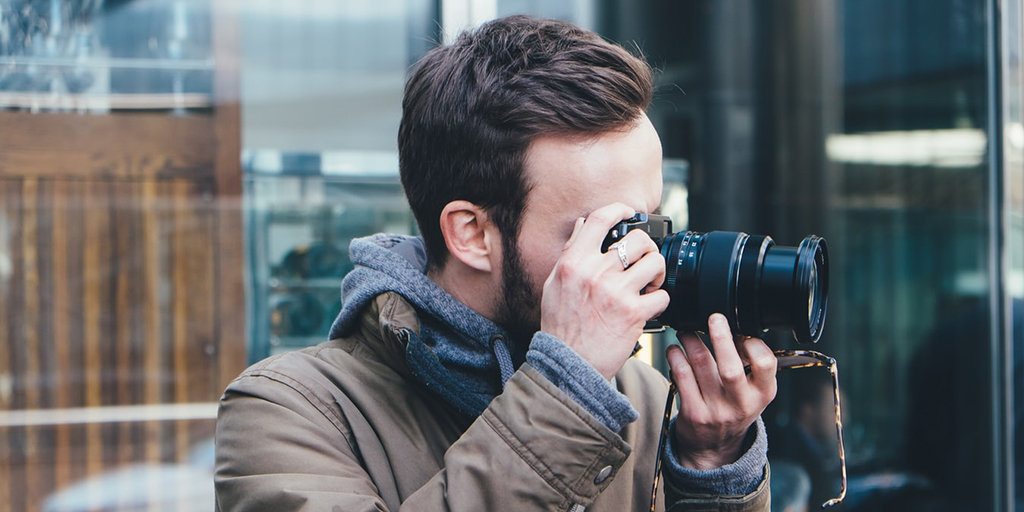
Using top-quality commercial photographs can set your business apart from your rivals and drive customers through your doors.

But, even knowing this, are you still unsure about hiring a business photographer for your company? After all, lots of firms use photos taken on smartphones for their websites and social media posts.

While you could do this, you’d be missing out on five amazing advantages that come with working with a high-quality commercial photographer.

Keep reading to find out more.

1. Experience and Expertise

A commercial photographer will have the experience and knowledge to take picture perfect photos that highlight the best aspects of your business. This can give you stunning results that make your company stand out in your industry.

For example, your photographer could use a landscape photography technique to give a beautiful wide-angled view of your premises that looks amazing on display on one of your walls.

2. Access to High-Tech Photography Equipment

Modern photography equipment can be expensive, and you may not want to pay for that outlay if you don’t know how to use it correctly. A professional photographer will bring their own equipment and use it to your advantage.

They will also update their devices, so they are always using the latest tech to take the best photos for your company.

3. Develop a Brand Identity

Good photography can capture your brand identity and tell a story. If you have different staff members taking photos each time, this can lead to your picture displays looking disjointed and unprofessional.

But, a photographer will use the same style and technique each time they shoot photos for your business.

4. Unique Perspective

While you can take short breaks to help refresh your brain, you’re still going to have preconceived ideas about which types of photos you would like for your marketing materials.

But, a business photographer will come in with a fresh pair of eyes and may notice aspects of your buildings and products that you take for granted as you see them every day.

This could help them come up with photo ideas that you may not have thought of.

5. Cost-Effective

When you have excellent product photography and photo ads to use online and in your sales brochures, you can massively increase your sales revenues. Clients will be impressed by your commitment to quality and get a better view of your products.

This can ensure you receive a handsome return on your photography services investment.

Hire a Top-Class Business Photographer

Hiring a business photographer allows your business to benefit from expert knowledge while also providing you with an affordable photography solution. In addition, you will be able to tell your business story through pictures and create a strong brand image that resonates with your employees and clients alike.

If you haven’t yet hired a commercial photographer, now might be the right time to book an appointment with a high-caliber photography professional.

If you’ve found this post helpful, be sure to check out more of our Photography articles.

April 11, 2022 by: Miles

The Best Sources for Funny and Weird Stock Photos

Did you know that more than 600,000 businesses get started each year in this country? And if any of those businesses, including yours, want to survive past the first year, they’ll need to invest heavily in marketing.

But many can’t afford to hire professional photographers or graphic designers. So how do they create content for the visual generation?

With stock photos and stock illustrations. You can find free and cheap stock graphics online in every category. And if your business is a little quirky, you can even find weird stock photos.

So what are the best places to find strange stock photos and graphics? Read on below for some popular options.

Unsplash

Unsplash is a completely free website with many thousands of stock photos available for immediate download. The platform is known to attract quality photographers, so the bulk of the photos are high quality and beautiful.

But searching for weird and funny stock photos is easy to do. There are plenty of strange images on the platform, allowing you to create content that speaks whatever message you are trying to communicate.

Bigstock

Big Stock is home not just to photographs, but also to illustrations and graphics. Quality ranges from unique to cheesy. But there is plenty of weird stuff in there to satisfy your creative itch.

They have sheets containing multiple graphics, which allow you to create various types of marketing materials from one download.

It’s not free, nor is it cheap. But they have monthly subscriptions plans where the more your download, the cheaper everything will be.

Topfoto

Sometimes you need images from the golden age of illustration. And no, we aren’t talking about the 1960s. We’re talking about the 1800s.

Punch Cartoons began in 1841 in the UK. They provide just enough humor and wit in their designs to allow you to craft unique marketing messages.

Punch has an exclusive deal with Topfoto for licensing. If you want to play around with these class cartoon stock images, you can look here for more information.

Adobe Stock

Once upon a time, this platform was called Fotolia. It’s a huge library of images in every category.

You can find some pretty bizarre images if you look beyond the surface. Sharing content from a site like this will be sure to grab people’s attention.

Along with stock photos, they have vectors, videos, fonts, and tons of other creative assets for you to build out content and marketing campaigns.

A monthly subscription is very affordable and their free trial allows you to start with 10 free images. Your monthly price will depend on how many images you plan to download each month. You can go as low as 10 or as many as 750.

The Trick to Finding Weird Stock Photos

Countless websites offer you weird stock photos, some paid and some free. The trick to finding unique content is searching deep within the libraries of each website.

So whether you want high-quality photography or a silly stock photo meme, you’ll be able to find stuff that other users are missing.

Looking for more tips like this? Visit our blog now to keep reading.

March 21, 2022 by: Miles

The Creation of a Blockbuster: 5 Professional Film Production Tips

Did you know that more than four thousand feature films and nine thousand short films were submitted to the Sundance Film Festival last year? While many of those films were likely very well made, only a small percentage of those submissions were actually accepted.

If you want to get into a prestigious film festival like Sundance, or just get more views on YouTube, you are going to want to make sure that you have good film production.

Of course, this is easier said than done. While you don’t necessarily need a lot of money or need to go to film making school, you do need to know what you’re doing.

Luckily for you, we’re here to help with just that.

So if you want to learn how to make a blockbuster short film, then keep on reading and we will take you through everything that you will want to know!

1. Use a Lot of Light

Film is a visual medium. And perhaps the biggest thing that separates a high-quality film from a low-quality one is the lighting.

If your picture is underexposed then your audience is going to have a hard time making out what is going on. And the same thing is too true if everything is too bright and blown out.

By shaping and manipulating the light, you will be able to properly expose the image while allowing the lighting to enhance your story.

If you simply throw on the overhead light in your living and start filming, the picture will likely look flat and dull. If you can’t afford to bring in movie lights, then you can go outside and take advantage of the sun.

Try to film in the morning and evening, when you can backlight your subjects with gorgeous golden light. You want to avoid filming outside in the middle of the day when the sun is shining straight down and your actor’s face will be hidden in shadows.

2. Prioritize Crisp, Clear Audio

As we previously noted, film is a visual medium. But that doesn’t mean that you should ignore the audio. Audio is fifty percent of the viewing experience, after all.

If you have a movie that looks beautiful but the audio is full of static and pops, you’re audience is going to focus on the bad sound instead of the lovely cinematography. You should definitely invest in good audio gear before you start paying for all of the cool camera accessories.

When you make your movie, bring on someone to be a dedicated sound person. This person can focus on the audio levels and make sure that you get all of the audio that you want to capture.

Don’t just leave your audio concerns for post-production.

3. Avoid Shaky Footage

Unless you are filming one of those first-person horror movies that were popular in the 2010s, you want to avoid shaky camerawork. Ideally, you’ll be able to put your camera on a tripod the whole time. And if you can’t do that, then you should get a rig to attach to your shoulder so that you can keep the camera steady.

Try to move your camera rarely and do it deliberately. If you are constantly panning and tilting, your audience is going to get dizzy and your camera movements will lose their power.

If you end up with shaky footage despite your best efforts, then you can try to make use of video stabilization software. Of course, this should be used as a last resort and you shouldn’t use it as an excuse to capture shaky footage on set.

If your footage is really shaky then software likely won’t be able to help you that much.

4. Understand the Rule of Thirds

The rule of the thirds is a foundational principle of film composition. When you look at the frame, you want to imagine a grid of three evenly-spaced vertical and horizontal lines.

Your goal should be to place the subjects at the cross-sections.

With that said, there are no true rules when it comes to filmmaking and many great filmmakers happily break these rules. But when you are just starting out, you should first try to abide by these rules so that you’ll better understand how to take advantage of them.

5. Get Good Gear

Using good camera gear can get expensive. But if you have the funds and believe in the project, then it can definitely be worth spending money on it.

You can look here for high-quality lenses and cameras. Camera companies like RED and ARRI are two common and reputable manufacturers that make digital cameras.

You also want to get nice lenses. If you’re on a tight budget, you should opt for a zoom lens so that you can use one lens to get pretty much all of your shots.

Remember to Use These Film Production Tips for Your Next Movie

Hopefully, after reading the above article, you now understand the importance of these film production tips and will be able to use them for your next movie. As we can see, you don’t necessarily need a lot of money to make a blockbuster short film but you do need to know what you’re doing.

By being deliberate with your filmmaking decisions, and knowing what to prioritize, you can make a film that looks good and people will enjoy.

Are you looking for other helpful articles like this? Check out the rest of our site today for more!

March 18, 2022 by: Miles

How to Take Good Instagram Pictures Your Followers Will Love


If you’re trying to build a brand online and grow your following on social media, then quality content is key. On Twitter, this means pithy comments and amusing observations and on Tiktok this means dynamic and engaging short-form videos. On Instagram, however, it’s all about those photos.
You don’t need to be a professional photographer to learn how to take good Instagram pictures, but you do need to have a good eye. If you’re struggling to execute the vision you have for the photos you have in your head, then this guide can help. Read on to learn how to take Instagram photos your followers will love.

Find the Light

While it is possible to edit the exposure in photos you’ve already taken to make them brighter, it’s always best to begin with good lighting. When you want to take a picture, don’t think only about the composition. you should also be making a mental note of where the best lighting can be found.

One of the best Instagram selfie tips is that natural light will always be better than artificial, so use it where possible. Sometimes, this will mean waiting until the perfect time of day to get the light to hit where you want it, but it’s worth it in the end.

Use the Rule of Thirds

Going back to the composition for a moment, let’s talk about what makes a good photo. Your composition is the way your photo is arranged and the elements it includes. To take a good photo, you’ll need to think about how it will look to the viewer.

There’s a rule in photography called the rule of thirds. It states that an image should be divided into a 3×3 grid, and the subjects or objects in a photo should be aligned along the lines of this grid to create balance. If you’ve got an iPhone, you can even turn on the gridlines for your phone camera in settings, and use them to practice aligning your photos.

Get a Great Editor

When you take any photo, there are always going to be certain things you’ll want to improve. Luckily, with all of the editing options available today, this is completely possible. You can use editors to remove or add objects, brighten or darken a picture, or even change the color and tone. If you want to have a grid that’s super cohesive in its look and style, check out these presets now.

Get Creative

On Instagram today, there is a lot of homogeneity. A lot of influencers are posting suspiciously similar Instagram selfies. Because this is the case, your followers will appreciate it if you get creative and think outside the box—don’t be afraid to try something a little bit different.

How to Take Good Instagram Pictures

It doesn’t have to be difficult to learn how to take good Instagram pictures, it just takes a little research and time. Follow the above tips to create a gorgeous grid your followers are going to go crazy for. If you’re looking for more tips on how to grow your social media following, check out the rest of our content now.

March 10, 2022 by: Miles

7 Creative Save The Date Ideas

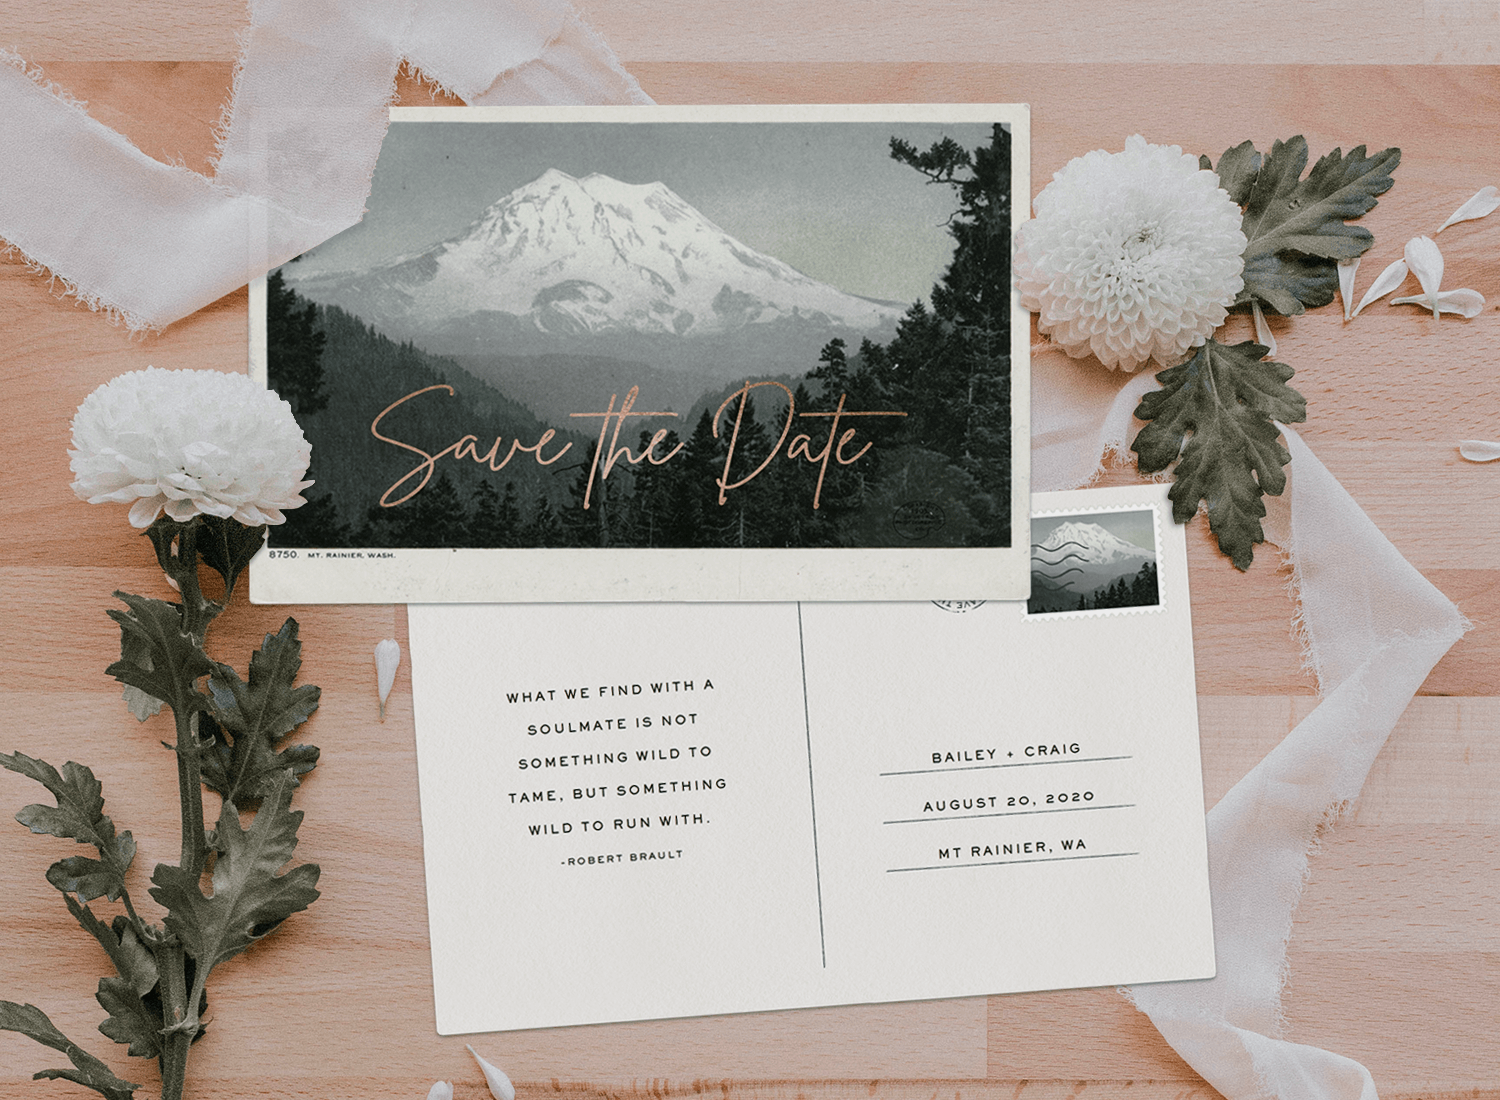
Sending save the dates gives your VIP guests plenty of time to get organised, so that they can join you and your soon-to-be spouse on your special day. This important piece of wedding stationery provides a hint of your wedding theme, tone and style, and reminds guests to reserve the date of your up-coming wedding on their calendar.

If you’re tying the knot during peak wedding season, your invitation may be competing with lots of invites sent by other people, so it’s essential that you choose a design that stands out from the crowd.

If you’re looking for a beautiful and creative idea for pre-wedding invites that will surprise, amaze and delight your family and friends, here are 7 stunning suggestions to inspire you…

  • Timelessly Traditional

Your wedding style will undoubtedly influence the type of design that you want to feature in your wedding stationery. If your dream wedding is an affair that is traditional and formal, you may want to follow suit with your personalised pre-wedding invitations.

Traditional doesn’t have to be predictable and boring though. You have unlimited options when choosing how to display wedding information text and an eye-catching image on your luxurious premium quality cards.

You can choose from classic swirly calligraphy script, vintage, retro or modern style typography, or contemporary infographics. Metallic foils, embossing and stamping can also provide simple, striking and visually impacting embellishment that instantly elevates any formal and understated card design.

  • Show Off A Photo Portrait

Many couples are choosing to display a focal point romantic photo on their save the dates. To ensure that your cards are unusual and unique, it’s a good idea to pick a design that features a favouite photo that’s cleverly positioned as a centrepiece.

Once guests have taken a note of your wedding day information, they can easily slip your pre-wedding invite into a chic photo frame and cherish it as a keepsake. This elegant double-duty design is suitable for both portrait and landscape format shots.

  • Mix & Match

If you love all things romance, but want to incorporate a practical element into the design of your orginal pre-wedding invites, there’s absolutely no reason why you can’t have both.

An elegant and slimline rectangular card made from premium quality recycled paper can be beautifully embellished with personalised text, and include a gorgeous photo decorated, detachable bookmark. You can customise the design further by adding a stunning floral crown, garlands or border, or keep it sleek and simple with an attractive font and lots of white space.

If the bookmark doesn’t appeal to you, you can easily swap it for a strip of quirky photo booth images of the two of you looking suitably loved-up.

  • Feature A Fab Polaroid Shot

To create the most impact with your stylish save the dates, choose a design that reflects your personalities, style and sense of humour, while also instantly letting the recipients of the cards know who is getting hitched.

Decorate sleek, square cut cards with a Polaroid photo of you and your beloved. A short and sweet line of text is sufficient embellishment to make your up-coming wedding announcement.

  • Artistically Bespoke

Bespoke illustrations provide an unusual and original way to decorate cards that announce your intention to wed. If you, or someone you know, is artistically minded, you can let you imagination run wild and create a one-of-a-kind design to feature on your invites.

Explore your favourite art medium, and use watercolours, inks and stamping to add colour and detail to your bespoke illustration design. You could even draw you and your beloved in a funny cartoon style, if the idea appeals to you.

Don’t forget to feature your wedding colour palette to beautifully blend with other elements of your wedding stationery suite, and wedding venue décor.

  • Keep It Real

If over the top romantic elegance is just not your style, you can always opt for a striking pre-wedding invite design that is fresh, modern and fuss-free. A simple and minimalistic typography design that highlights a personal message on the front, and all of the important wedding related details on the reserve side, is the way to go.

To add a touch of colour and designer influence to a simplistic card design, you can customise the liner of the envelopes that you send your invites in. Feature a bold pop of colour, wedding palette hues, or a pattern, print or illustrated image of your choice.

  • Attention Grabbing Novelty

Blow up balloons, magnets and scratch-off cards continue to be popular novelty attention grabbing ideas to incorporate into your personalised card design.

Custom-made paper items like travel documents, luggage tags, maps, and folded aeroplanes and fans are just the ticket for destination weddings. Other fun paper items you can consider are retro inspired, cut-out paper dolls complete with a variety of optional outfits, and practical coasters that are printed onto thicker card.

If you’re getting married on a tight budget, you can always save money by baking your own edible pre-wedding cookies that are decorated with a custom stamp. Alternatively, you can send your guests a personalised tea bag that flaunts your wedding details on the wrapper.

Whatever design you and your partner decide to choose for your save the dates should ideally reflect your personal style (individually and as a couple), and also beautifully set the tone for the big event.

January 20, 2022 by: Miles

Photography Tips to Make You Look Like a Pro – Ram Chary

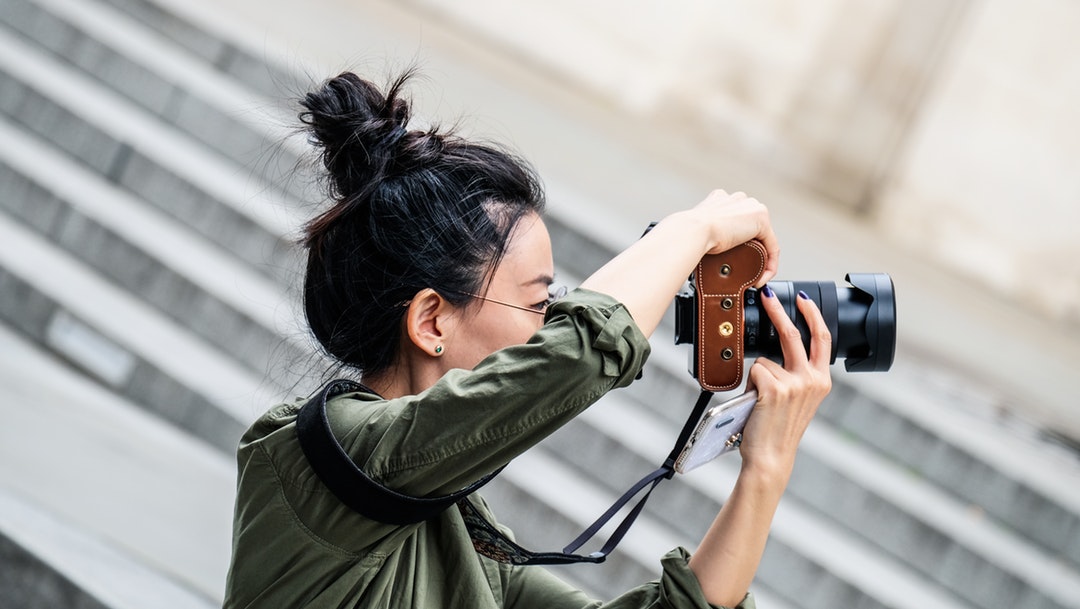
Photography is the art of capturing images with a camera and presenting it in a creative manner. Professional photographers like Ram Chary and others know that there are some basic tips that can help you to step into the world of photography.

Here are some basic tips for beginners:

Use a Tripod

Using a tripod for your photos is a good idea as it makes the camera more stable and takes better pictures. Also, you can use a timer for self-portraits.

Make Use of Light

Good lighting plays an important role in photography. You can make use of sunlight or natural light to illuminate your subject. However, you must remember that a photograph’s exposure is determined by the amount of light falling on it. If you want to capture a rich and high quality image, use a tripod with a good camera at a low ISO setting with the aperture wide open.

Pay Attention to Focus

Good focus is required if you want to take better pictures. You can also try taking higher shots from above rather than looking from below, which will produce more attractive images as higher shots give an illusion that everything in the picture is bigger and wider.

Take Plenty of Shots

Never be satisfied by just one shot, as there are chances that you may miss out on something important due to lack of time or may overlook some small detail while clicking photos. So make sure that you keep on clicking until you see your desired result on your camera’s LCD screen.

Save Your Photos Properly

If you are using a digital camera, you should save your photos on the memory card as soon as you click them. This will ensure the safety of your images from getting lost or deleted due to any technical faults. Also, do not forget to format your memory card after saving your photos. If necessary, make a backup of all your photos on a CD or hard drive so that they can be recovered anytime if something goes wrong with the memory card containing those pictures.

Composition of Photos

Composition is very important for every photographer, and here are some basic tips regarding this:

  • Always try to include some foreground elements in your photographs that will help you present viewers with more information about the subject in your photos. You can also use different experimental patterns for composing shots like triangles, circles, lines, etc.
  • Never leave your camera on automatic mode if you are not satisfied with the images produced by it. Try to play with aperture, focus, exposure, etc., in order to get better quality photos which you can later edit if required.
  • Do not include too many things in one shot as it may confuse your viewers about what you want them to see, thus producing an irrelevant picture that will spoil your entire collection of photos. So be selective while taking pictures and make sure that everything included in them is worth looking at; otherwise, delete them immediately.

Add Colors With Proper Editing

After clicking a photo, you should spend some time editing them as they will make your pictures look more natural, vibrant, and eye-catching. You can also add some introductory music to your edited photos in order to make them lively and entertaining for your viewers.

January 18, 2022 by: Miles

9 Photography Hacks to Make Your Photos Better – Ashwin Khubchandani

As a beginning photographer, you may be overwhelmed with the number of photography techniques. Professional photographers like Ashwin Khubchandani and others say that there are nine techniques all photographers should master. Here’s the list of techniques to always remember while taking a picture.

1. Be Patient

Remember, the best shots are often when you least expect them. So be patient and wait for that perfect shot. If you’re rushing, then your pictures will come out blurred and unfocused. By taking your time and not rushing, you’ll capture the perfect shot.

2. Watch your lighting

Natural light is always best for taking photos because it shows the subject’s natural beauty. Avoid direct sunlight when taking a photo, as this can create harsh shadows and highlight imperfections. Rather than using direct sunlight, use the sun behind you as a directional light for your subject.

3. Know your camera

Always take time to know your camera and how it works. This will help you understand what settings are most appropriate for each shot. In addition, it makes taking pictures much easier when you already know what to do.

4. Pay attention to the background

It’s not just the subject that matters, but the background too. Make sure you look around, so you avoid clutter or messy backgrounds distracting from your photo’s main subject. A clean and uncluttered picture shows a good composition and makes for an impressive shot.

5. Use leading lines in your photos

Leading lines can make a picture much more compelling and interesting. These come from many sources, such as roads and fences. Leading lines lead the viewer through your image and direct their attention toward the subject in focus. The viewer should be naturally led to the important part of the photo by these precise lines.

6. Have a clear focal point

A picture is not just about taking an image for its own sake, it’s also about providing information. So there should always be one major focal point that readers’ eyes are drawn towards – this could be engaging, or perhaps something that tells a story or evokes a feeling in the viewer. In addition, it should often evoke a sense of movement, either leading you to see a moving subject or creating a sense of flow across the image.

7. Use Rule of Thirds

When you place your subject in the right position, it makes for a more interesting shot. Imagine dividing your viewfinder into thirds, both horizontally and vertically – this will give you four intersecting points within the frame. Position your subject on one of those intersections to give it focus and create an artistic shot.

8. Watch out for distracting background elements

Not only are messy backgrounds ugly – they detract from what should have been the main focus of the photograph, which is often the subject itself. By keeping an eye on background distractions, you can make sure that nothing is pulling away from your photo’s main point. This way, people will appreciate seeing a clean and focused image instead of a distracting background.

9. Be spontaneous

You may know what your subject will be, but sometimes the most interesting photos come from being spontaneously creative with your shot. Take a step back from your composition for a minute and consider whether it needs anything else that could make it more attractive or eye-catching. For example, you can incorporate flowers, people, or even animals into the photo for more interest and atmosphere.

January 18, 2022 by: Miles

Why Are Backgrounds And Props Essential For Photos? – Bruce Weber

One of the most asked questions photographers like Bruce Weber get is how to achieve an interesting background when shooting with available light. The answer lies in having a great location, being prepared with plenty of props, knowing your camera angles well enough so that the changing of lenses is quick and simple, and finally, knowing how to interact with your subject so that you can keep their attention focused on your camera.

Having good contact with your model is essential.

Props are essential for more than just filling up pictures that might otherwise be bare. To set the mood or give a “touch” of authenticity, they will always add something to the picture. Many times, if it’s funny, offbeat, or provocative enough, it may become the center of attention in the picture rather than the model.

A prop like a fishing net can be used in numerous ways.

The great location is, of course, essential for getting any picture in the first place and is part of what makes it accessible to others outside of your studio or living room. The more unusual and striking it is, the better chance you’ll have with interesting backgrounds.

One thing that has changed over the years in fashion photography is how important it is for models to interact with their surroundings rather than pose. Nowadays, that approach doesn’t interest younger generations of photographers and models really…nor does it bother those who are now interested in shooting photos. The more “real” it seems, the better.

What about the time of day? Well, that’s another key factor to take into account when thinking about locations that have interesting backgrounds or where you want to shoot your subject against a particular kind of background. If it’s an unusual location, you’ll need to do your scouting before the actual shoot. There’s nothing more frustrating than showing up with your model and finding that the location isn’t what you expected it to be or that it lacks any interest at all.

Another element to keeping the background interesting is knowing how to take advantage of available light. The more you know about available light, the less likely it will be for you to find yourself in a situation where you can’t take advantage of any of it. Other times, one has to make do with what’s available and try using different kinds of props and changing your camera angles and positions to get what you want out of the shot.

A big part of good background is knowing how to position your subject to work with the lighting and tell a story.

The first skill you need to master is how to use your camera angle creatively for more than just getting rid of backgrounds or filling up bare walls. You will also learn how changing your angle can create new relationships between you, the background, and the person in front of your lens.

Whether you’re taking a portrait or photographing the background first and your subject second, it’s important to know how to position them within your camera frame so that there is some dynamic going on between what’s in front and what’s behind them.


October 7, 2020 by: Miles

Elevate Your Images: How Using Lightroom Will Do Exactly That

Are you looking to up your photography game?

Editing and enhancement software like Lightroom can give your photos a unique edge. But if you’ve never used Lightroom before, you might not know what the big deal is.

We’re going to tell you! Read on for these top reasons you should be using Lightroom today.

Getting Organized with Lightroom

Whether you’re a beginner or an old pro, Lightroom can perfect for all skill levels. It’s especially useful if you’re shooting in RAW. This is a better file format as it captures more detail than JPEG.

You have to process RAW photos. So, you’ll need to learn how to use one of the software options if you don’t know how to already. If you don’t have any editing software, you shouldn’t shoot in RAW. You won’t be able to see them.

Organized Image Management

You can use Lightroom import to duplicate your images. You can have one for the catalog, and keep another as a backup.

You can ever do this in different formats. For example, RAW for the catalog and JPEG for the backup.

It’s easy to apply metadata and keywords to your images on import too. And you can apply any of the processing presets as well.

Allows Logical Workflow

The way Lightroom works is it’s made up of modules. These are:

  • Library
  • Develop
  • Web
  • Slideshow
  • Print

You only will see features that made sense for the mode you’re working in at the time. This makes Lightroom quicker to learn, and it’ll be faster in practical performance.

You Don’t Lose Originals

A huge advantage is that your edits remain separate from your original photos. Unlike Photoshop, you’re never actually altering the photos themselves in Lightroom. So it’s non-destructive editing.

Lightroom records your editing history. This lets you return to any point in your editing and start over from that point. Or, you can press reset and start from the very beginning again.

You can create virtual copies and make alternative edits. Then you can compare the edits and keep the ones you like best. It won’t bog down your system either. These virtual copies only take up a tiny amount of memory.

Before and After Views

There’s also Lightroom’s before and after feature. In a single click, you can go back to see what you were working with before you started editing. Then back again to what you have now. It’s a good way to stop yourself from taking images too far.

You have 4 different views in Develop mode. These let you see the difference between your edited, adjusted, and original photos.

The split modes are especially useful. They’ll allow you to see changes to a single photo. You can drag the dividing lines to zone in on specific parts.

No Limit on Undo

Because lightroom acts more as a database, rather than a traditional image editor, Lightroom can undo everyting you’ve done at any point. You do this by using the History panel, and it’ll work even if you exit the program and go back in.

With Photoshop, you only get 20 undos (or history states). And they’re only available during the current session. Close it, and your history resets.

While you can increase Photoshop’s number of undoos, it’ll eat away at your hard drive space and slow the program down. This is becuase it actually creates another copy of the photo every time you edit something. Yikes!

Over 2 Million Add-Ons

If you’re going to miss working in Illustrator and Photoshop, don’t panic. You can download thousands upon thousands of items from them to make you feel at home. These include:

  • Fonts
  • Add-ons
  • Presets
  • Illustrations
  • Actions

With Envato Elements membership, you’ll have unlimited access to this fast-growing library. There are millions of creative design assets to explore.

Streamlined, Easy Cloning & Healing

With the Spot Removal brush, you can set it to healing or cloning. Healing with blend the surrounding pixels. Cloning will copy those pixels with no blending.

You can click, or click and drag to get rid of blemishes, power lines, wrinkles and so much more. You can even set the strength of these changes with opacity controls.

Batch Editing in Lightroom

The ability to apply settings from a single photo to several others is another huge benefit. This means that with the click of a button, you can do a quick and efficient edit to an entire session.

When you have edited a photo to how you like it, you can take those edits that you’ve made. You then apply them to the other images from that session that have the same exposure and lighting.

But it doesn’t end there. When you’ve applied those edits, you can still change or play around with anything you applied. You’re not stuck with the same edit settings if you don’t want them all to look exactly the same.

If you’re choosing to sync any of the filter options over several images, you might need to adjust them a little. Highlight the filter you used on each photo. Then select the PIN that appears, and move this effect around. If you’re cropped several images, you can adjust it on each image to better suit it.

You shouldn’t overlook batch editing in Lightroom. This will be a huge time-saver for those large sessions and multi-edit situations. Check this out if you’d like to find out more on how to batch edit in Lightroom.

Once You’re Using Lightroom You Won’t Look Back

As you can see, using lightroom can elevate your photoshoots to the next level.

Not only does it make managing your entire portfolio a breeze, it will also keep your original photos pristine. Every tool you could ever need is available through add-ons, and all of this can be applied to batches of images, saving hours when working with a full photoshoot.

If you found this article useful, be sure to check out our other blog posts.

September 24, 2020 by: Miles

How to Make Holiday Cards Stand Out This Season

Holidays are characterized by spending time with loved ones. Gifting is an indication of how deeply you care for someone. When sending gifts this season, remember to send along a custom Mixbook Christmas photocard for an outstanding gifting experience.

About Personalized Holiday Photo Card Templates by Mixbook

Do you seek to create the perfect holiday photo card this season? Fortunately, Mixbook is there for you. This platform makes it easy to upload your favorite photos and even add your personal touch to it. This season, you can create customized holiday photo cards that are adorable to your friends and relatives.

Mixbook lets you make your photo cards with a rare background and images. It also lets you select the text and theme you prefer. Give your recipient a unique experience this season by selecting a unique holiday template from Mixbook.

Gift Ideas and Trends You Should Consider

If you are considering sending holiday cards this season, it would be best to partner it with a meaningful gift. This season, think of something that speaks to the soul of your relationship with your recipient. Considering your loved ones’ hobbies and interests to come up with a relevant gift always shows how much you care.

Thoughtful gifts can come in handy. Consider something simple but resourceful. If you are undecided about what may tickle their fancy, consider holiday theme photo books, gift cards, or take them out on a dinner.

Remember to always include a copy of your custom photo holiday cards with your gift. Not only will it let your recipient know who gave the present, but they will also acknowledge the time, work, and effort you put in to come up with your personalized card.

With the online editor, Mixbook gives you limitless possibilities for designing tailor-made holiday photo cards. You can browse a wide range of beautiful designs, then customize your holiday greetings to your heart’s content.

With Mixbook, everything from graphics to backgrounds to the text you use is entirely customizable. You get to choose a template, whether traditional or modern. This gives you access to a set of custom holiday photo cards that will be memorable to your dear ones. Also, Mixbook is equipped with designs that express your spiritual self. You can choose from hundreds of religious photo Christmas cards or create your own custom Christmas photo book to share with your favorite persons.

Why You Should Try Mixbook

· User Friendly – Unlike other platforms, Mixbook is easy to apply. It simplifies uploading photos from the year and editing them to come up with a unique and lovely card.

· Customizable – Mixbook lets you explore your creativity. Its various features ranging from backgrounds, texts, and themes, are entirely customizable. This allows you to design your card according to your tastes.

· Many Features – As a photo editor, Mixbook gives you numerous features to choose from. Besides simplifying your work, its varied features let you come up with an original masterpiece with ease.

· Quick Delivery – Mixbook demands minimal waiting time. After placing your order, you will get your photo goods in a timely manner, thus reducing inconveniences.

Bottom Line

This holiday, choose to make your seasonal greeting remarkable. Give your relatives and loved ones a unique gifting experience by using personalized holiday photo cards from Mixbook.


  • 1
  • 2
  • 3
  • Next Page »

About Us

I’m Miles, the editor and creator of this blog. I am a big nerd for anything tech related and I have also developed a big passion for photography and film. I discovered this passion after taking a course in school and ever since I have fallen in love with capturing everything from sports, to travel, to cars, and much more Read More…

Connect With us

  • Facebook
  • Instagram
  • Twitter

Newsletter

Facebook

Action Life Blog

About Us

I’m Miles, the editor and creator of this blog. I am a big nerd for anything tech related and I have also developed a big passion for photography and film. I discovered this passion after taking a course in school and ever since I have fallen in love with capturing everything from sports, to travel, to cars, and much more Read More…

Newsletter

Facebook

Action Life Blog

© 2022 · Fun Genesis WordPress Theme by, Pretty Darn Cute Design